

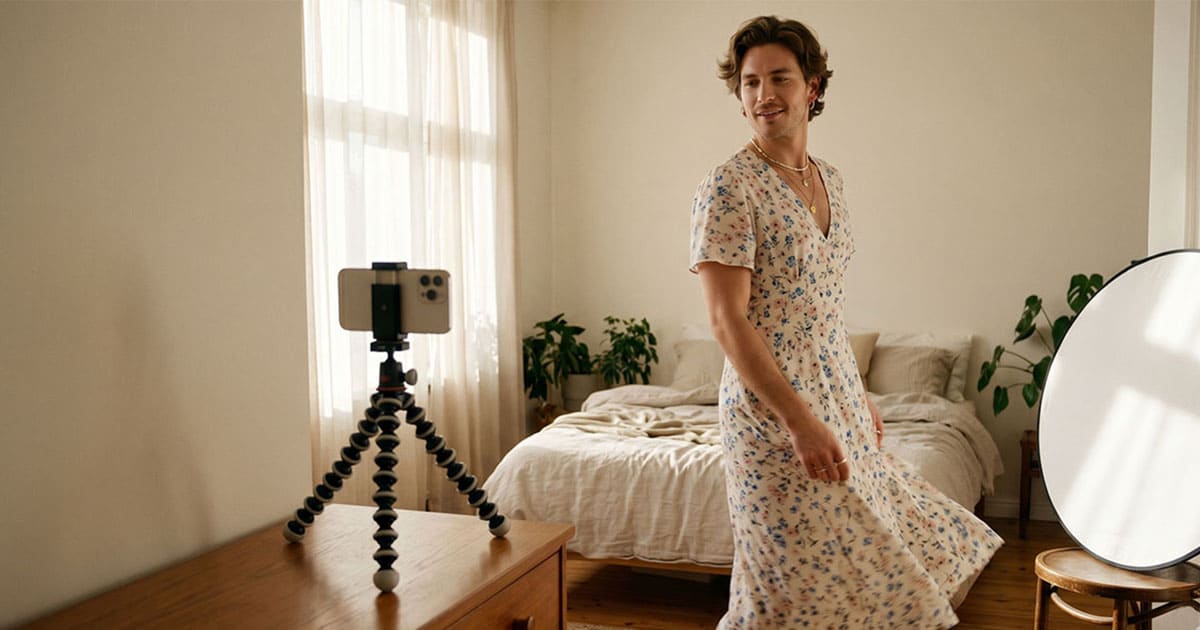
How to Photograph Your Crossdressing Looks at Home (Privately)
A practical guide to planning and executing a crossdressing photoshoot at home — with the phone you already own, light from a window, simple posing, and privacy preserved end-to-end. Includes how to add motion to your favorite shots.
One of the quietest pleasures in crossdressing is documenting a look you put real care into — for yourself, in your own home, nobody else needed. But most "home photoshoot" advice was written for influencers with ring lights and assistants. This guide is different: it walks through how to actually plan and execute a crossdressing photoshoot at home with the equipment you already own, with privacy preserved end-to-end, and with options for both still photos and short video clips of yourself in motion.
Why home photoshoots are worth the effort
For most crossdressers, the gap between the mirror reflection (which usually looks great) and the selfie (which often disappoints) is wide. Camera lenses distort, lighting from above casts hard shadows, and the asymmetry of your face on a still photo doesn't match the symmetric version your brain remembers from the mirror.
A planned photoshoot closes that gap. With even minimal preparation — better light, a few practiced angles, the right outfit you already know works on you — the results can match or exceed what you see in the mirror. And keeping the whole process private means the only person whose opinion matters is yours.
Setting up the space
You don't need a studio. You need three things: enough room to stand and pose, a clean background, and good light.
Pick the right room
Bedroom or living room work best. Bathroom mirrors are tempting but the lighting is usually flat or harsh and the reflective surfaces complicate the shot. Look for a room with:
- A large window — daylight is the single most flattering free light source
- One uncluttered wall — solid color preferred, but a bookshelf or curtain works as a background too
- Floor space for at least 1.5m between you and the camera, ideally 2-2.5m for full-body shots
- A locking door if your privacy depends on it
Light placement
Three rules cover 90% of what you need:
- Stand facing the window, not away from it. Soft daylight on your face is the most universally flattering light there is.
- Avoid overhead lighting. Ceiling lights cast shadows that make jawlines look more angular and emphasize beard shadow. Turn them off and rely on the window.
- If the window light is uneven, add a white sheet, a piece of foam-core board, or even a folded white towel on the dark side to bounce light back.
If you're shooting in the evening, place a desk lamp with a soft bulb at face height, about 45 degrees in front of you. Daylight bulbs (5000-6000K) are more flattering than warm yellow ones for portrait work.
Background choices
Plain walls are easiest. White, light grey, or any solid color works. If your wall is busy:
- Hang a clean bedsheet from a curtain rod
- Use a curtain as a neutral backdrop
- Stand in front of a closet door
- Use the corner where two walls meet for a clean V-shape behind you
Keep the background visually quiet. The outfit should be the subject, not whatever's hanging on your shelf.
Camera setup with what you already have
Your phone camera is enough. Three setup decisions matter more than the camera itself:
- Use the back camera, not the selfie camera. Back cameras have higher resolution and less distortion. You'll need a way to trigger the shutter — either a self-timer (most phones have a 3 or 10 second option), a Bluetooth shutter remote ($5 on Amazon), or smartwatch as remote control.
- Mount the phone steady. Tripod ($15-25), a stack of books, or even propped on a chair. Hand-holding produces shaky frames especially in lower light.
- Set the camera at chest or hip height, not face height. Cameras above eye level shorten the body and exaggerate jawline; cameras below chin level lengthen the neck and slim the face. Hip height for full body, chest height for portraits.
Posing without overthinking it
Most "bad" home photos come from standing rigid and looking directly into the lens. Three small adjustments make a measurable difference:
- Turn your body 30-45 degrees away from the camera, then turn just your head and shoulders back. This narrows the shoulder line in the frame, the biggest single improvement most beginners see.
- Shift weight to one leg, bend the other knee slightly. Adds a natural hip curve that straight stance erases.
- Hands somewhere with purpose. One hand on hip, both behind your head, hand touching the back of your neck, holding the edge of a skirt — any of these is better than hands dangling at your sides.
Try ten variations of one outfit. The "best" photo is rarely the first one. Two or three angles per pose, two or three poses per outfit. You'll throw most away.
Why a short video changes the experience completely
Still photos are flattering when they work, but they freeze you at one moment in one angle. The result is always a partial version of the experience. A short video — even 5-10 seconds of you turning, walking across the room, or shifting between poses — captures something photos can't: the way you move in the look.
This is the moment most crossdressers describe as the one that genuinely clicked for them. The dress moving with you, the skirt falling as you turn, the way your posture reads in real time. It's a different kind of seeing yourself.
You can record this directly on your phone — set the camera to video mode, hit record, do your poses or just walk a few steps. The same camera and tripod setup works.
If you've taken a photo you love but didn't capture video on the day, FemStyle AI lets you animate that single photo into a short video of yourself moving in the look — natural movement like walking, a slow turn, fabric movement. Our AI video tool handles it from one still image. Many crossdressers use it specifically to add motion to the photos they already have, without having to set up the shoot again.
Privacy across the whole process
Photos and videos of yourself in a crossdressing look are personal documents. A few simple habits keep them that way:
- Turn off cloud auto-backup before shooting, or move the shoot photos to a folder excluded from sync. iCloud Photos and Google Photos will otherwise upload everything by default.
- Keep the photos in an encrypted folder. iOS has the hidden Photos album (password-locked from iOS 16). On Android, use Files by Google's "Safe Folder" or a third-party vault app.
- If you use any cloud service to enhance, edit, or animate the photos, verify the privacy policy. FemStyle AI auto-deletes uploaded photos from servers after a short window and never uses them to train AI — generations live only in your private gallery.
- Delete from the camera roll after backing up to your private storage. Browser caches and accidentally shared albums are the most common leak vectors.
- If you share with one trusted person, use a messenger with disappearing-message support (Signal, Telegram secret chats) rather than email or standard SMS.
What to do with the photos after
This is the question nobody else's photoshoot guide asks. For crossdressers, "what do I do with these" is a real consideration.
Options that match different comfort levels:
- Keep them entirely for yourself. Complete answer. Many crossdressers do exactly this for years.
- Share with one trusted friend or partner who knows about the activity. Almost always meaningful, almost never regretted.
- Anonymous posting in supportive communities (r/crossdressing, dedicated forums) — face cropped or blurred. Validation without risk if you choose this path carefully.
- Use them as references for your AI stylist conversations — show what you've already worn so the next suggestion builds on it. Our stylist takes context from previous outfits to refine recommendations.
- Print one — there's something about a printed photo of yourself that hits differently from a phone screen. Even one 10x15 print kept in your private storage.
A simple two-hour home photoshoot plan
If you have one quiet evening:
- (15 min) Pick the outfit. Ideally one you've already worn once and know fits well — first photoshoots while also breaking in a new outfit usually disappoint.
- (15 min) Set up the room: clear background, window or lamp positioned, phone on tripod or books at hip/chest height.
- (20 min) Get ready slowly. Skincare, light makeup if you do that, hair, accessories. The slow ritual is part of the experience.
- (45 min) Shoot. Self-timer or remote, multiple angles, body turned 30-45 degrees, three or four poses. Record a few 5-10 second video clips too.
- (15 min) Review. Pick the three you like most. Delete the rest if you want. Move keepers to private storage.
- (10 min) Optional — animate your favorite still photo with FemStyle AI video for a short clip of yourself moving in the look. This is often the part people end up watching most.
Animate your favorite shot into a short video →
If you're still working toward your first outfit, start with our guide on crossdressing for beginners for the safe ordering and first-wear setup. And if you want to preview an outfit before ever ordering it, our virtual try-on shows you the look on yourself in under a minute.
Frequently asked questions
What's the most important thing for a home crossdressing photoshoot?
Soft daylight from a window, with you facing the light. Everything else — camera, posing, outfit — matters less than getting the light right. Ceiling lights are flat and harsh; daylight is universally flattering and free.
Do I need a real camera or is a phone enough?
A phone is enough. The back camera has higher resolution and less distortion than the selfie camera, so use that with a self-timer or Bluetooth remote. Mount it on a tripod or stack of books for steadiness. Camera quality matters less than light, angle, and the outfit fitting well.
How can I take a video of myself in an outfit without recording it live?
You can record live with your phone's video mode and a self-timer, but if you've already taken a photo and want to add motion afterward, our AI video tool animates a single still photo into a short clip of yourself moving naturally — walking, turning, posing. Many crossdressers use it specifically to add motion to photos they already love.
How do I keep crossdressing photos private on my phone?
Turn off cloud auto-backup before shooting (iCloud Photos and Google Photos will otherwise upload everything by default). Move keeper photos to the hidden/locked Photos album (iOS) or a Safe Folder app (Android). Delete from the regular camera roll once moved. Avoid sharing through email or standard SMS.
What's the best pose for hiding wide shoulders in photos?
Turn your body 30-45 degrees away from the camera, then turn your head and shoulders back partway. This narrows the apparent shoulder line in the frame. Pair with a relaxed, hip-shifted stance — straight, square-on stances emphasize shoulder width and hide the waist.
Should I edit the photos afterward?
Light editing only — exposure, contrast, slight color warmth. Heavy face-smoothing or body editing rarely matches the actual you and makes the photos read as fake when you look back later. The goal is a clean version of the real result, not a different person.
What do most crossdressers do with their home photoshoot results?
Keep them for themselves, share with one trusted person, or post anonymously (face cropped) in supportive communities. The "right" answer is whatever matches your comfort level. Many keep everything entirely private for years and that's a complete experience in itself.